Sending domains
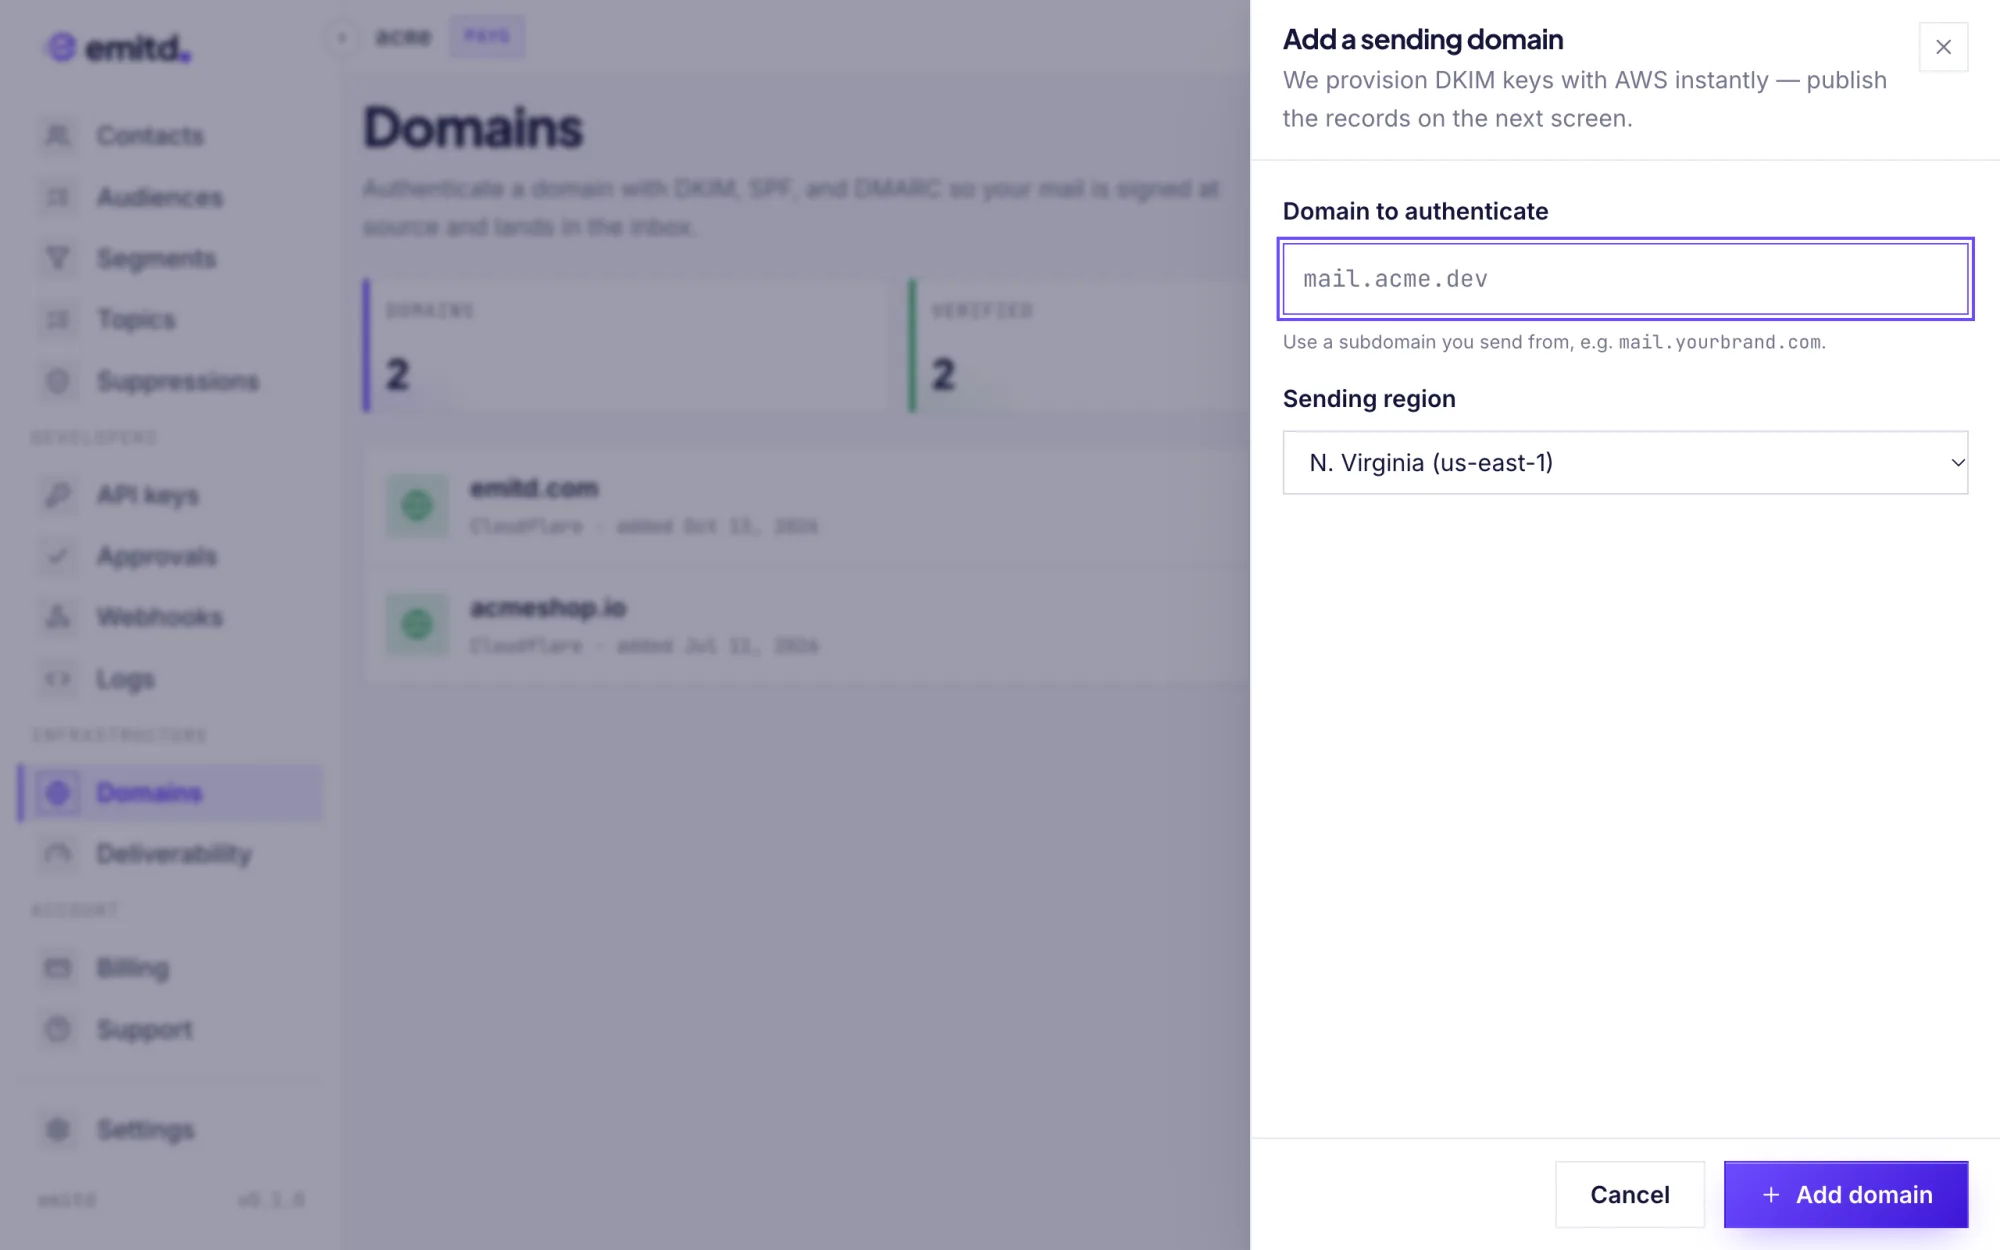
Verify your custom domain with 1-click Domain Connect, Cloudflare auto-publish, zone file export, or manual DNS records.
Every email sent through emitd must originate from an authenticated, verified sending domain. Until verified, dispatch attempts from unverified domains fail with from_domain_not_verified to prevent domain spoofing and preserve global inbox placement.
Manage your domains in the Console under Domains.
Setup methods
emitd offers four configuration paths — from fully automated one-click registrar flows to manual zone entry:
| Method | Supported Providers | How it works | Credentials required |
|---|---|---|---|
| Domain Connect | GoDaddy, IONOS, 1&1, Squarespace, WordPress.com | Click Set up in one click. You are redirected to your registrar to approve the records. | None — authenticated directly at your registrar |
| Cloudflare Auto-Publish | Cloudflare | Enter a scoped Zone.DNS:Edit token. emitd creates and merges records automatically. | Ephemeral API token (never stored) |
| Zone File Export | AWS Route 53, Google Cloud DNS, Azure DNS | Download an RFC 1035 .zone file containing only missing records and import it. | None |
| Manual Configuration | Any DNS registrar or host | Copy each record individually with one-click copy buttons in the console. | None |
1. One-click setup with Domain Connect
emitd supports the open Domain Connect standard (RFC-backed specification co-developed by GoDaddy, Microsoft, and major registrars).
The official Emitd service template (emitd.com.mail.json) is approved and merged in the official Domain Connect Templates repository.
How it works:
1. Add Domain (Console) ➔ 2. DoH Discovery (_domainconnect.<domain>)
➔ 3. Signed Sync Apply URL ➔ 4. Registrar Consent Dialog
➔ 5. Records Applied ➔ 6. Verification Complete (< 2 mins)- Open Domains in the Console and click Add domain.
- emitd queries
_domainconnect.<yourdomain.com>via DNS-over-HTTPS (or nameserver fingerprinting for GoDaddy) to discover your registrar's Domain Connect sync endpoint. - If supported, a Set up in one click (or Configure with Domain Connect) button appears.
- Clicking the button securely redirects you to your registrar's authentication portal.
- Review the pre-populated DNS records (SPF, DKIM, custom Return-Path, and DMARC) and click Authorize.
- The registrar automatically writes the records to your DNS zone and redirects you back to
https://app.emitd.com/domains/detail. - emitd verifies the live records via DoH and flips your domain status to Active within 2 minutes.
Cryptographically signed requests (RS256)
emitd signs synchronous Domain Connect apply requests with an RSA-2048 private key (RS256). Your DNS provider verifies the signature against Emitd's public key published in DNS at _dcpubkeyv1.emitd.com. No account passwords, API tokens, or login credentials are ever exposed.
Official template record specifications:
The merged emitd.com.mail.json template configures the following records:
| Record Type | Host | Content / Rule | Behavior & Safety |
|---|---|---|---|
| SPFM | @ (apex) | include:amazonses.com | SPF-Merge: Merges into existing v=spf1 records (e.g. Google Workspace or Microsoft 365) without creating duplicate records or causing RFC 7208 PermErrors. |
| TXT | _dmarc | v=DMARC1; p=none; adkim=s; aspf=r | DMARC: Configures baseline DMARC monitoring. Respects existing DMARC policies via txtConflictMatchingPrefix: "v=DMARC1". |
| TXT | %selector%._domainkey | v=DKIM1; k=rsa; p=%domainKey% | BYODKIM: Publishes your domain's dedicated 2048-bit RSA public key under the relay selector. |
| MX | mail (%spfDomain%) | 10 feedback-smtp.%region%.amazonses.com | Custom Return-Path: Routes bounce and delivery notices to your custom subdomain for strict SPF alignment. |
| SPFM | mail (%spfDomain%) | include:amazonses.com | Subdomain SPF: Authorizes SES for the custom Return-Path envelope sender. |
2. Cloudflare auto-publish
If your domain's nameservers are hosted on Cloudflare:
- In the domain details screen, click Auto configure.
- Provide a Cloudflare API token scoped with Zone.DNS:Edit permissions for your specific zone.
- emitd connects to the Cloudflare API, safely creates the DKIM, Return-Path MX, and DMARC records, and intelligently merges
include:amazonses.cominto your existing root SPF TXT record. - All email records are created as DNS-only (grey cloud) to ensure mail servers can resolve MX and TXT records directly without HTTP proxying.
- The API token is used in-flight and immediately discarded — it is never stored in any database or disk log.
3. Manual DNS configuration
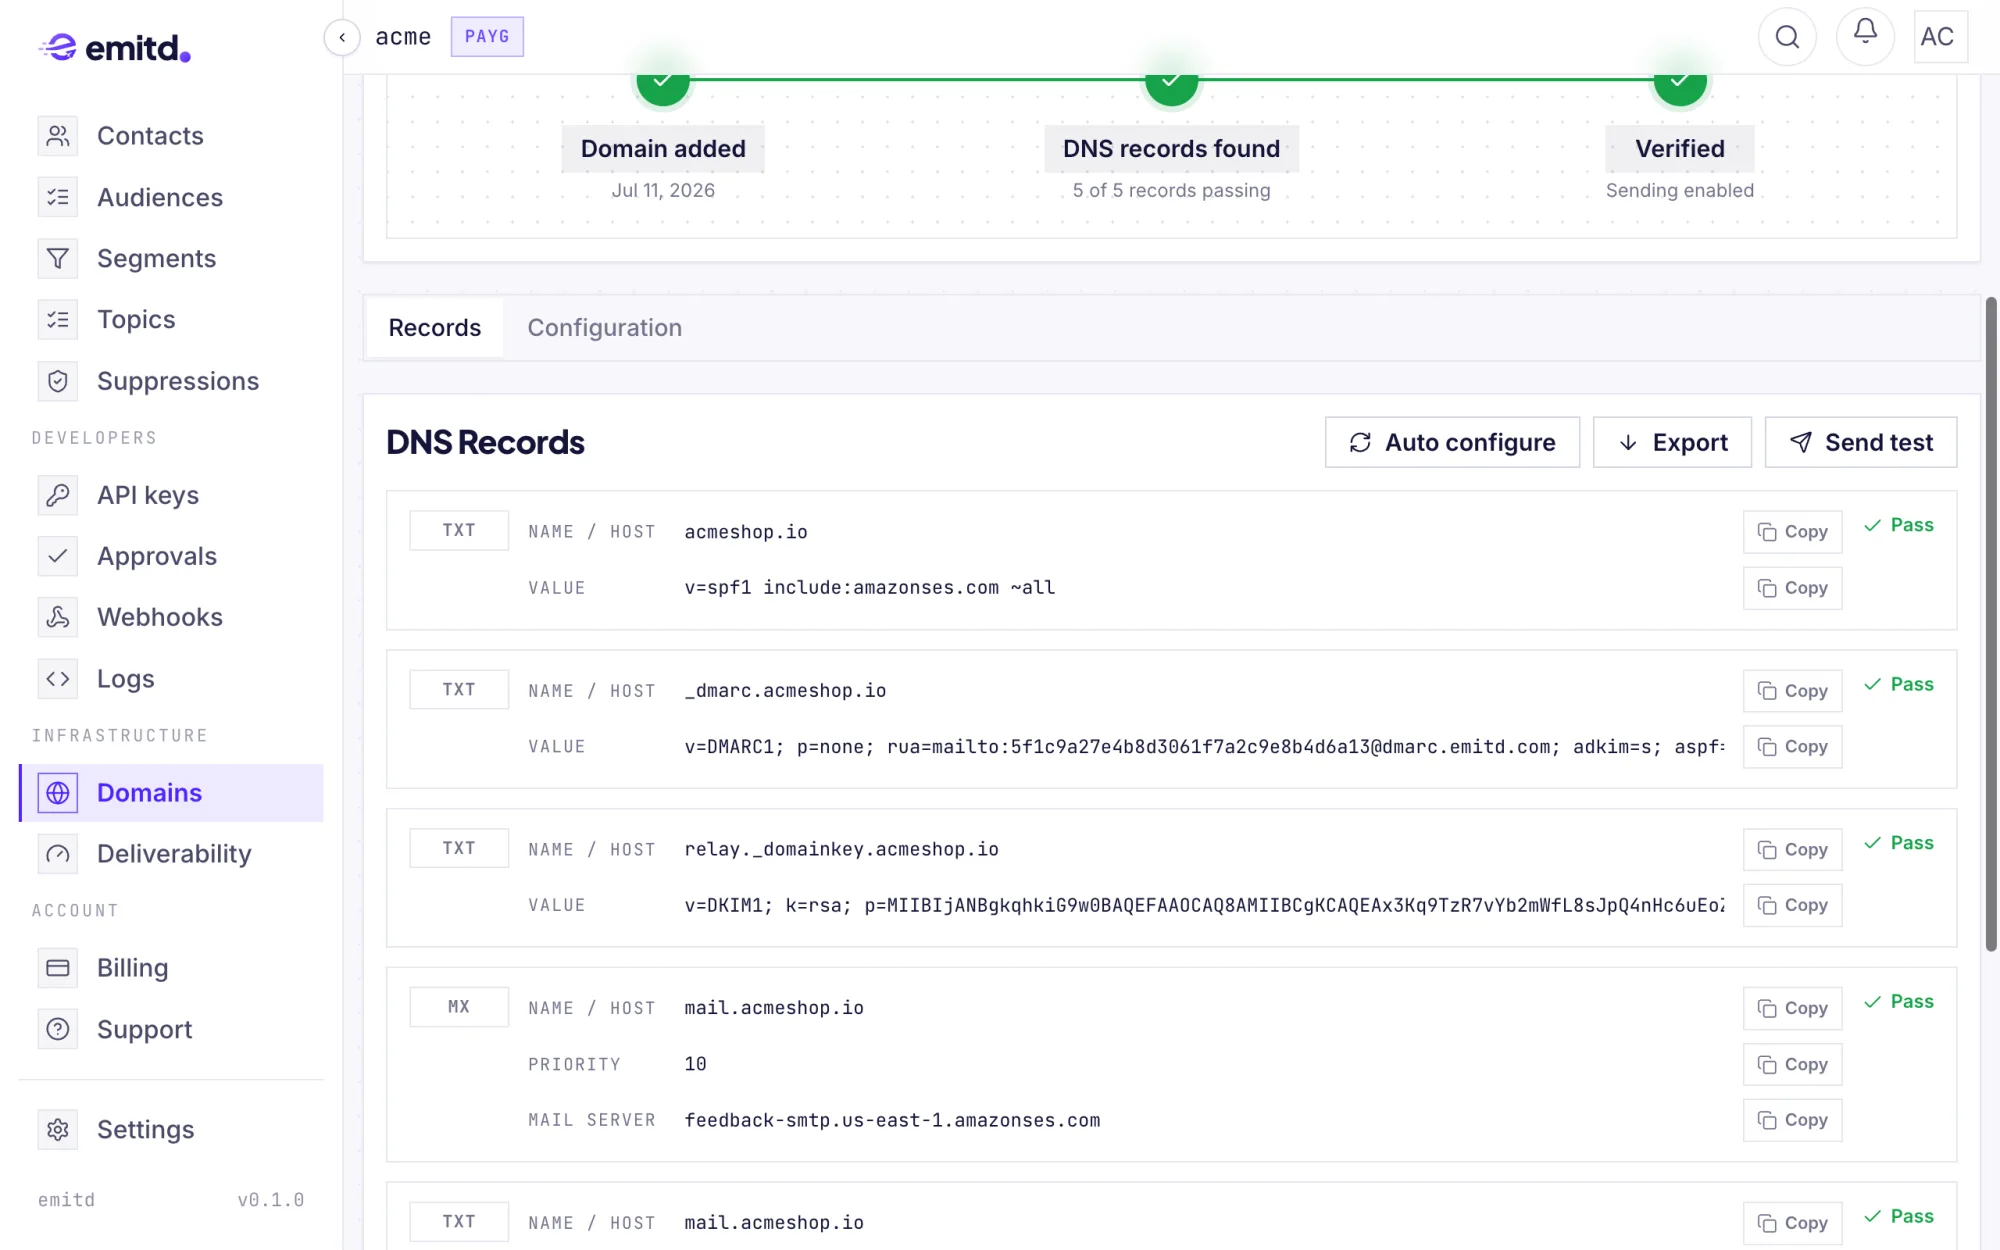
If your registrar does not support Domain Connect or API tokens, add the following five records directly in your provider's DNS management portal:
| Type | Host / Name | Value / Destination | TTL | Purpose |
|---|---|---|---|---|
| TXT | @ (or root domain) | v=spf1 include:amazonses.com ~all | 3600 | SPF: Authorizes AWS SES to dispatch emails for your root domain. |
| TXT | relay._domainkey | v=DKIM1; k=rsa; p=<your-2048-bit-public-key> | 3600 | DKIM: 2048-bit cryptographic key verifying email integrity. |
| MX | mail (or mail.<domain>) | feedback-smtp.<region>.amazonses.com (Priority: 10) | 3600 | Custom Return-Path: Aligns the envelope MAIL FROM address with your brand domain. |
| TXT | mail (or mail.<domain>) | v=spf1 include:amazonses.com ~all | 3600 | Return-Path SPF: Authorizes SES on the mail bounce subdomain. |
| TXT | _dmarc (or _dmarc.<domain>) | v=DMARC1; p=none; adkim=s; aspf=r | 3600 | DMARC Policy: Informs receivers to monitor alignment without rejecting legitimate mail. |
Critical: Never create multiple root SPF records
According to RFC 7208 §3.2, a domain MUST NOT publish more than one SPF TXT record. Publishing multiple v=spf1 records causes receiving mail servers (Gmail, Yahoo, Outlook) to return a permanent PermError, causing your emails to fail SPF checks or land in Spam.
If you already have an SPF record for Google Workspace or Microsoft 365, merge include:amazonses.com inside your single record:
v=spf1 include:_spf.google.com include:amazonses.com ~allUnderstanding emitd's email authentication architecture
emitd is architected for modern email deliverability standards enforced by Google and Yahoo:
- Single 2048-bit BYODKIM TXT instead of 3 CNAMEs: Legacy email services force you to configure three separate CNAME delegations pointing to their third-party servers. emitd generates a dedicated 2048-bit RSA keypair unique to your domain, provisions it directly to AWS SES, and requires only a single TXT record at
relay._domainkey. - Dedicated Custom Return-Path (MAIL FROM): Default AWS SES setups use generic
amazonses.comenvelope bounce addresses, causing SPF alignment to fail under strict DMARC checks. emitd configuresmail.<yourdomain.com>as your dedicated Return-Path so both the headerFromand envelope sender match your brand domain. - DMARC Relaxed Alignment (
aspf=r): Because user-facing emails originate from<yourdomain.com>while bounce notifications route throughmail.<yourdomain.com>, DMARC relaxed SPF alignment (aspf=r) ensures that your subdomain passes DMARC checks 100% of the time.
RFC 1035 zone file export & bulk import
To configure your DNS in seconds without copy-pasting records one by one, click Export on the domain details screen:
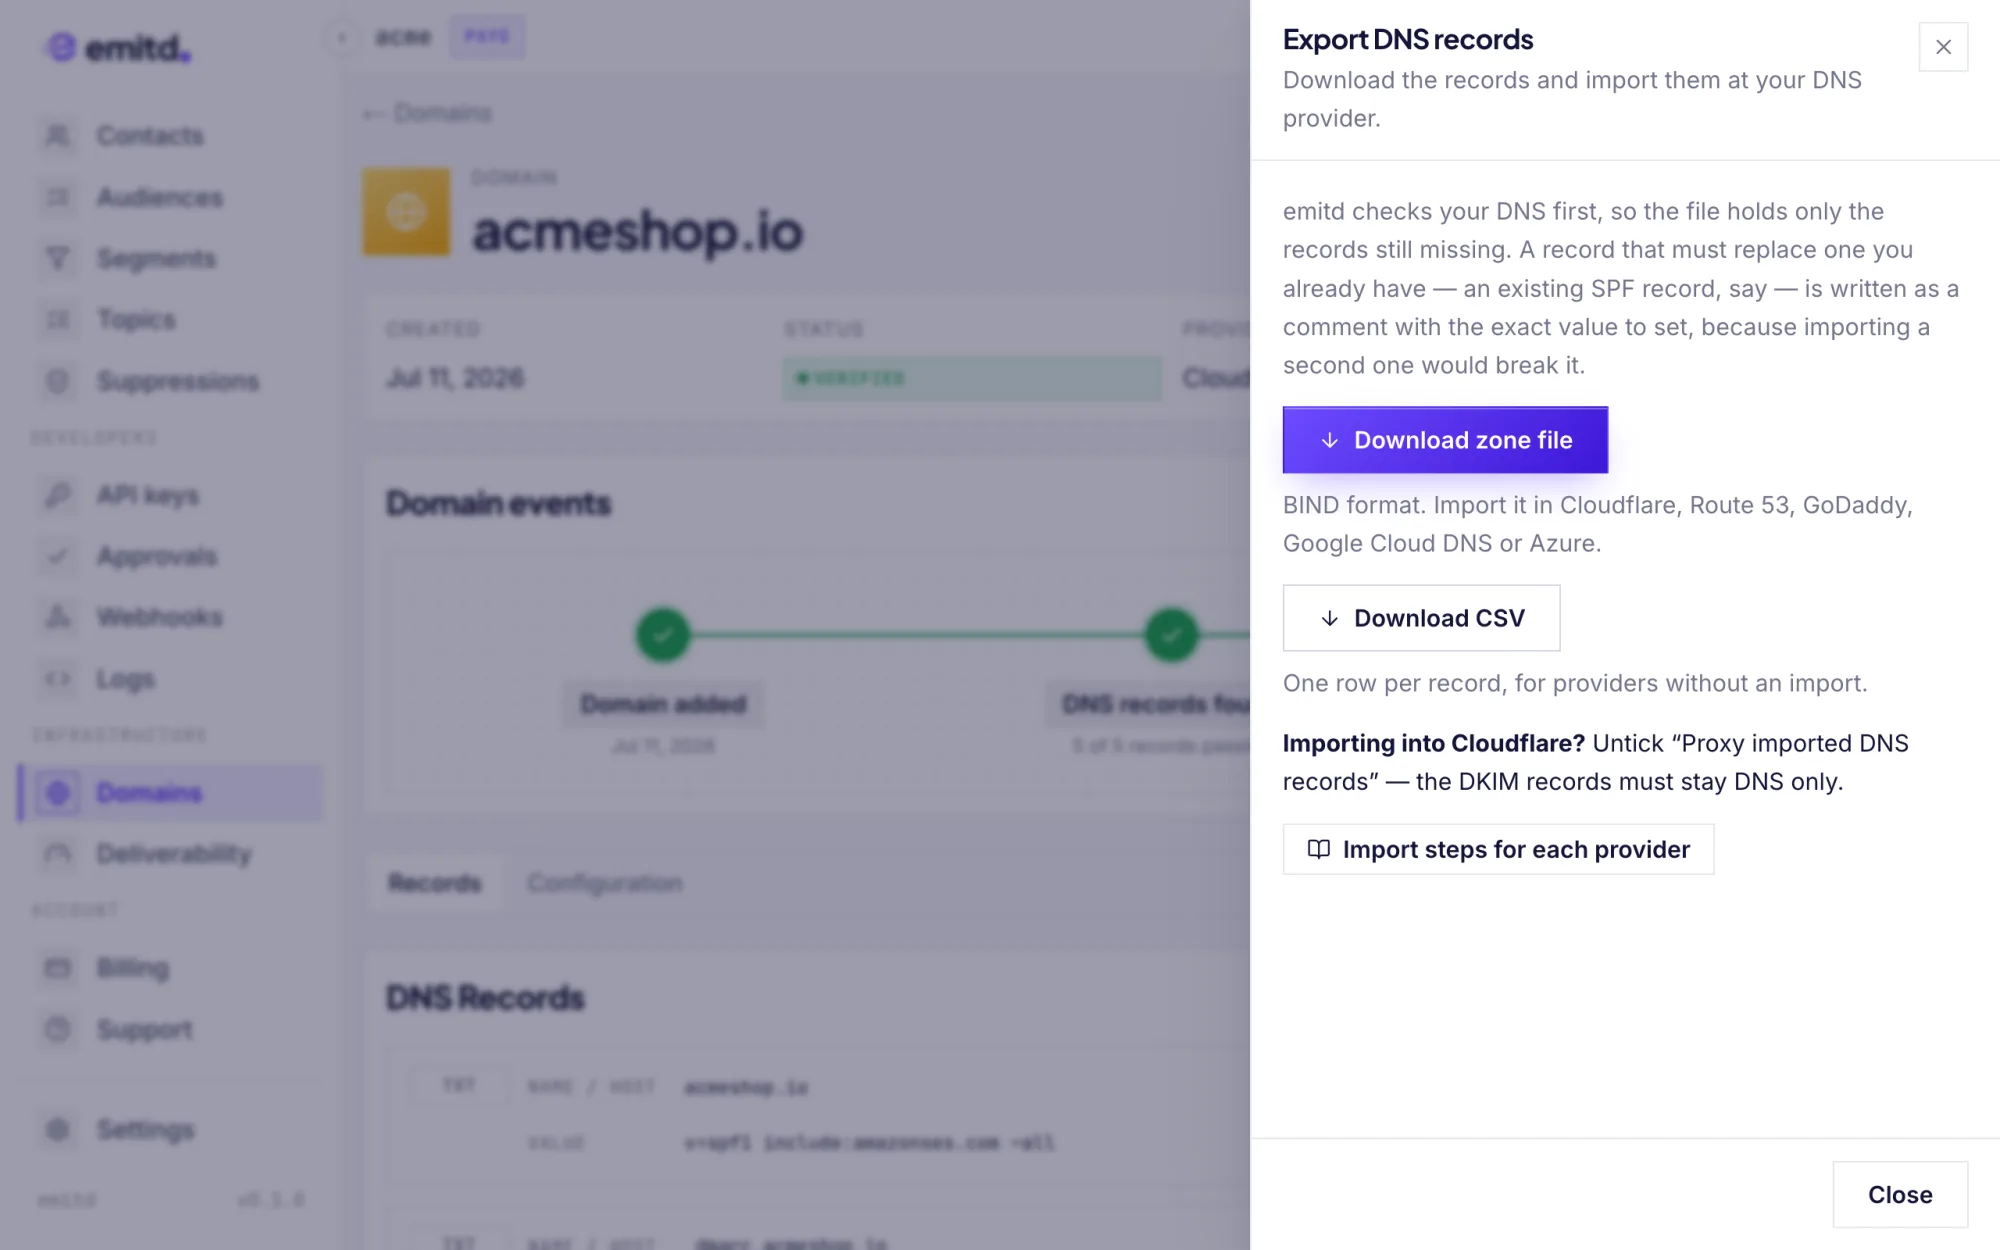
- Zone file (RFC 1035): Standard BIND format supported by major cloud DNS providers.
- CSV: Tabular export for manual reference.
emitd checks your live DNS before generating the file, so the export contains only the records still missing:
- Already published records appear as commented-out lines to prevent duplicate conflicts.
- Records requiring modification (such as an existing SPF record needing
include:amazonses.comappended) are highlighted with the exact merged string to paste.
| Provider | How to import the RFC 1035 zone file |
|---|---|
| Cloudflare | Navigate to DNS → Records → Import and Export, select the file. Important: Untick "Proxy imported DNS records" — DKIM and MX records must remain DNS-only (grey cloud). |
| AWS Route 53 | Navigate to Hosted zones → select your zone → Import zone file, paste file contents. |
| GoDaddy | Navigate to Domain Portfolio → select domain → DNS → Actions → Import Zone File, click Apply Zone File. |
| Google Cloud DNS | Run gcloud dns record-sets import <domain>.zone --zone=<zone-name> --zone-file-format |
| Azure DNS | In the portal, navigate to DNS zone → Import zone file, or run az network dns zone import -g <group> -n <zone> -f <domain>.zone |
Domain Connect FAQs & troubleshooting
The one-click button appears when emitd detects that your domain's authoritative nameservers belong to a provider supporting Domain Connect (e.g. GoDaddy, IONOS, 1&1, Squarespace). If your nameservers point to Cloudflare, AWS Route 53, or a provider without Domain Connect, use the Auto configure (Cloudflare) or Zone file export buttons instead.
No. The official Emitd template (emitd.com.mail.json) uses Domain Connect's SPFM (SPF-Merge) directive. Instead of replacing your existing TXT record, the registrar automatically merges include:amazonses.com alongside include:_spf.google.com or spf.protection.outlook.com. Your existing MX records, website A/CNAME records, and verification tokens remain untouched.
Yes. Domain Connect uses an asymmetric cryptographic handshake. emitd signs each request with an RSA-2048 private key (RS256), and the registrar validates the signature against Emitd's public key published in DNS at _dcpubkeyv1.emitd.com. You log into your own registrar account to review and authorize the changes — emitd never receives or stores your registrar credentials.
When using Domain Connect or Cloudflare Auto-Publish, records are written instantly and typically propagate through global DNS within 30 to 120 seconds. You can click Check now on the domain screen in the Console to run an immediate DNS-over-HTTPS verification probe.
Domain-scoped API keys
To enforce least-privilege security across multi-tenant applications or distinct microservices, you can pin API keys to a specific sending domain:
- When creating an API key in the Console, select Sending access.
- Restrict the key to your verified domain (e.g.,
billing.yourdomain.com). - Any API requests using this key with a
fromaddress outside this domain will be rejected withfrom_domain_not_verified.
Next steps
Email deliverability & DMARC
Learn how SPF, DKIM, DMARC, and custom Return-Path work together to ensure 99%+ inbox rates.
Quickstart guide
Send your first email using curl or an official typed SDK.
API Recipes & Code Patterns
Explore production code snippets for transactional and marketing emails.
Deliverability analytics
Monitor real-time bounce rates, spam complaints, and ISP delivery metrics.
Templates
Server-side rendered email templates with immutable versions and {{ variable }} substitution.
Email deliverability & inbox placement
How emitd protects your sender reputation with SPF, DKIM, DMARC, custom Return-Path, dual streams, automated suppressions, and compliance with Google and Yahoo sender guidelines.